Showing posts with label DIY. Show all posts

Thursday, February 19, 2009

DIY Project: Cupcake Stands

Continuing with the DIY projects....

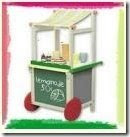
I turned this cupcake stand from Martha Stewart Celebrate products sold at Walmart


into these for our Sprinkles cupcakes:

The stands are really affordable (only $7.88 each). I didn't use the included paper garland as shown in the photo above. I used my favorite edge punches from Martha Stewart (you sense an obsession with her?) to make mini papel picado banners that I used on the invites, and some ribbon in our colors.

A quick review comment: Don't be fooled by the photo. The edges of the cardboard are not white but rather unfinished brown cardboard. It probably was fine but I thought it was unsightly so I painted the edges white to match.

I also made matching signs to point out the different kinds of cupcakes. I was going to pick the top 3 from the blog quiz I posted for our final flavor selections. I know that the quiz is officially on-going but I needed to get this off the list so went ahead with what currently was in the lead (which also was what we wanted anyway). My choice was Chocolate Marshmallow, Matt's choice was Chocolate Peanut Butter, and the blogosphere's choices were Red Velvet, Coconut, and Vanilla Milk Chocolate.

Yummy!

The signs were simple. I used leftover cardstock from the invitations, the Martha Stewart Crafts edge punches, and the Avery sticker labels.

The stands should hold about 4 dozen and we can reuse for the Nebraska Dessert Reception. But what to do about the 5th dozen? The reception venue has some trays we can use and since I am running out of steam this may be what happens. Normally I would care that I have no idea what they look like and freak out that they probably won't match. But I am in a new zen-bride kinda mood and going to let what happens happen.

Anyone else having cupcakes? What flavors?

Tuesday, February 17, 2009

DIY Project: Agave Favors

You may not be asking for wedding advice, but I am going to give it.

DO NOT try to grow your own wedding centerpieces or favors!

Unless of course you have a green thumb - which apparently I do not. I have previously posted about the pots with small agave plants that I am using to decorate the reception tables. Afterward the guests can take home and plant as a favor. I have really enjoyed this project but think I have killed at least half of the plants. There was a horrific storm a few months ago and my lack of attention caused many casualties. Not to fear because I have recently "obtained" some more small agaves with the help of some covert graduate students, long gardening sheers, and a recently bloomed agave plant on the ASU campus (thanks ladies!).

Recently I finished the signs that will go with each pot.


On the back of the sign I adhered a Thank You note and directions on how to care for the plant using the Avery sticker labels. Each sign is made from a colorful Lotteria cards (a popular Mexican bingo-type game) and a Popsicle stick. So even if I kill the rest of the agaves I will have something to display.


Another great thing about the lotteria cards is that our quests can learn Spainish while they enjoy a Mexican dinner!

Thursday, February 12, 2009

Invitations Are Out!

We finally got the invitations in the mail!! But after some delays because of a few days of constant rain (yes, it does rain in the desert) and not wanting to risk get the invitations soaked. For those of you we see on a regular basis - don't worry - we will hand deliver as soon as we see you.

Here is a shoot of the different labels we made using Martha Stewart's craft punches and the amazing Avery labels I talked about in an earlier post.

My favorite is the Doily Lace punch bought from Walmart (pictured on the bottom). Michael's Craft Stores also has the punches from Martha Stewart and the store seems to get new ones everyday. I wish we would have gotten this Valentine Lace punch before we did the labels.

The best thing about being available at Michael's is their 40% off coupons. I have one in my purse and maybe this weekend I will have to get this punch. Or this Mini-heart punch.

Tough decision.

Tuesday, February 10, 2009

Just Married Signs and Getaway Cars

Did anyone else see this post featureing Just Married Signs from Ritzy Bee today? It gave me some inspiration on how to use our Just Married Sign.

I just love this one:
Aw... now I want to rent a cute convertible.

This brings me to a wedding etiquette question. Who decorates the bride and grooms car? I am not sure this is something we necessarily want but I am not sure of tradition here. It is probably something that the wedding party does. Hmmm, but we aren't having attendants.

Anyway, I just love these ideas from Martha Stewart Weddings.

Monday, February 9, 2009

Best Wedding Product Ever

Okay, so it really isn't intending for weddings and I am sure there are tons of other "best wedding products" out there. But for a DIY bride like me you can't live with out these:

They are 8 1/2 x 11" stickers that you can feed through your laser printer. I think that Avery also makes some for Ink Jet printers as well. It is only about $13 for a pack of 25 sheets and are avaiable at Office Max and Staples. They are intended for shipping labels but can work for som many other things. Maybe they are not as cool as having a Xyron Sticker Maker but I feel they work just a good, if not better, and more economical. The sticker is very thick and easy to work with.

I have been printing labels galore and cutting them down to whatever size and shape I need. I have used several craft punches like pictured below to keep consistent with our papel picado banner theme. These are way easier to use than printing something out on paper and then gluing/taping to another piece of paper. It is also much more secure. For some earlier projects I did without the stickers, I had problems with the corners sticking down, etc.

I originally got the labels to make our invitation address labels to go on our black envelopes. They worked like a charm. Matt did all of the printing, punching, and adhereing to the envelopes.

I have found many more uses for them and they will pop up in a couple of more DIY projects I will feature over the next few weeks.

I have found that searching the aisles of office supply stores has provided me with several shortcuts for my wedding decor. Craft stores are great of course, but the office supply stores also have products you can make work for your DIY projects. Sometimes you just have to think outside the box.

Anyone found their own "best wedding product ever' and want to share?

Sunday, February 8, 2009

DIY Project: Thank You Sign

Inspired by these:


I decided to make this:

In keeping with our papel picado banner decor I made a little flag for each letter. It was a really easy project. I printed out the letters using the same font as our STDs and Invitations. I worked out the number of banners so that the back side could say this:

I am not sure if I will print Thank You's with the sign picture but wanted to have a couple just in case. I plan on using pics with the Just Married sign in a wedding announcement card to other family and friends who can not make our celebrations. Hopefully our pics will be super cute!

Friday, February 6, 2009

DIY Project: Paper Flowers

For our Mexican themed Fiesta reception, I wanted to create several arrangements of paper flowers. Paper flowers are a big part of Mexican decor and are a great budget friendly way to add color and a handmade touch. Paper flowers were also an interactive element of our Save the Date announcements. I am going to ask a couple of people to bring their paper flowers to the Fiesta so that I can scrapbook them with their guest book advice entries. What do you think - a good idea or would it seem tacky?


Here are some simple instructions for DIY paper flowers:

Step 1: Cut squares of tissue. For smaller flowers I used 4 x 4 inch squares and 4-5 sheets per flower. For larger I used as large as 8 x 8 squares and 6 sheets. The more sheets, the fuller the flower but the harder it will be to separate the petals. For some of my flowers I added a smaller piece of tissue in an alternative color to create different flower centers.

Step 2: Stack sheets and fold like an accordion fan. 1" folds works well. Smaller flowers, use smaller folds.Step 3: Cut the edges of the fan for your desired flower shape. I used a couple different shapes to add different textures to my arrangement such as rounded (pictured), V-shape, and a deep V-shape.

Step 4: Secure the center of the folded fan. I used floral wire cut to 8 inches to create the "stem" of the flower.

Step 5: Fan out the fold on each side of the secured center. You will want to pull apart the folds down to the base of the flower. The better you separate the folds at this step the fuller and rounder the final flower.

Step 6: Pull the petals apart towards the center. Separating one layer at a time.

Step 7: "Fluff" and reshape petals to the desired look. The tissue is incredibly moldable so don't be afraid to pull and place where you want it. Sometimes I found that the two sides of the flowers were separated. To fix it I used a double sided piece of tap at the flower base to secure the two sides together.

Step 8: Arrange flowers. This is no different than arranging real flowers. I did use more double sided tape at the flower bases to get them to stick together. In some places of the arrangement you could see the stems and hiding pieces of tape gave the arrangement a fuller look with no holes.

I made 4 different arrangements to go on our Sweet Treats table. In keeping with my goals to reduce, reuse, and recycle the wedding decor, I used turquoise and purple drinking glasses as the vases that I will later reuse in the kitchen.

I must give a plug to an inexpensive paper flower kit from Martha Stewart Crafts. I learned a few other flower shapes from this kit that I won't explain here. She has a couple of ideas for other more complicated flower shapes. I don't know if my patience was wearing thin or if I am not ready to graduate to complex crafts, but mine didn't look as good so I stuck to the versions above.

Monday, January 5, 2009

More Cool Color Inspiration

I noticed that photos from the new Martha Stewart Weddings magazine were on-line today so I thought I would share some of the great ideas in this issue and how I would like to incorporate them. The major color palette presented in this issue is pink, yellow, and orange. Based on this inspiration board I made on Polyvore I am obviously a big fan of these colors:


Our color palette takes it a step further by brightening up these shades and adding turquoise, lime, and purple.

Sweet Treats: I am in love with these marshmallows! I have always wanted to try to make homemade marshmallows (my favorite sweet treat). I am hoping they are not time consuming and we can make them for the dessert reception in NE.


Hair Clips: These hair clips are so cute I might just have to make some for everyday use! Wouldn't these be great for flower girls? Next time I am at the craft store I will have to check out the flower section. Perhaps there is some sort of turquoise flower I can make a hair clip with for my ensemble...


Placecards: These simple, yet colorful placecards almost make me want to have seating at our reception. I love paper crafts of all sorts and a board with the seating assignments is the one thing I am not tackling. Hmm... we will see how much time there is to add another DIY project.


Ring Pillow: I love this idea for an easy to sew ring pillow. It gave me an idea to make either a ring pillow or a handkerchief out of an old shirt for my "something old". Stay tuned to see what I made...


Colorful Candles: I am not a big fan of candles- especially the smelly kind. But I absolutely love this table scape. The candles really do look like they are floating. Perhaps I could do this for a party someday...

Tuesday, December 23, 2008

Custom Map How To

So for those who know me it is no secret that I love maps. I collect antique maps, dream of someday wallpapering my craft room in maps, and my dissertation research is centered around maps. Therefore I wanted to have an awesome map for out wedding invitations.

Well as discussed in an earlier post about our invitations how I really wanted a custom hand drawn and colored map. This wasn't in the cards so I improvised and put my map making skills to work. I cannot freehand draw at all and won't embarrass myself by showing you a scan of my initial freehand draft. But I can for some reason trace using a computer mouse. It is sort of an extension of my own arm. Matt and I worked on this project together and was definitely a successful joint effort.

click to enlarge

To do this map I used Adobe Illustrator- an easy to use vector based graphic design program but unfortunately expensive. I started with a Google Map of Phoenix and then traced all of the essential roads. I then used symbols to mark the landmarks. I got the symbols from the Illustrator symbols library, downloaded some new ones, and designed and drew some of my own by tracing over scanned images. For several landmarks such as Camelback Mountain I imported a photo and traced over the outline. I then colored in the symbols. For a handmade feel, I downloaded a handwriting font from Free Handwriting Fonts to label all of the roads, etc.

I took my file to Office Max and printed color copies onto white cardstock, 4 maps to a page. I then cut them down to size and printed driving directions to our Fiesta Reception site on the back. The total cost was about 4 hours of work to make the map and only $0.11 each to print which included the paper. Yeah student discount! Normally they would be about $1.20 per page and depending upon the size of the map you could fit 3-4 per page. I am no "expert" using Illustrator but if you were just starting out with this program it would take a lot longer. Most of my time wasn't really drawing but design decisions. I drew inspiration from other wedding maps I have seen on the internet.

If anyone out there wants some additional advice or some help with their own custom map - send me an email and lets talk. I wanted to incorporate tons of other ideas into our map but this was just a 4 by 5.5 card! I would love to design maps for other couples.

We wanted a map that was useful, accurately showing how to get around town, as well as gave some insight to our personality and relationship. I think we did a great job and this is my favorite wedding DIY project to date. I can't wait until we graduate and move to do a similar "We've Moved" postcard to inform our friends and fam of our new address.

Monday, December 22, 2008

Wanna an Invite to a Party?

Before we left town for the holidays we finished our DIY invitations to the Fiesta. This was a big goal of mine because I knew the next few months would be full of small projects and I didn't want this big one to be drawn out and up all hours of the night addressing them. The goal with the invites was to translate the vibe of our reception - fun and festive with lots of color.
I have been supper jealous of all of the great Gocco stationary projects I have seen out there in the blogoshpere. But this wasn't feasable. Both becasue of the cost and that they are no longer making some of the supplies :(. But I think I made good use of our home laser printer and colored card stock. I used several different edge punches (via Martha of course) to make little papel picado banners and the address labels. These patterns appear all throughout the reception decor.
I wanted to have a pocketfold design of some sort but wanted to keep the amount of paper per invitation down. It seems that some pocketfolds out there are the size of a book. Lots of paper and postage expenses with those. So instead of a pocketfold ours is more of just an invite with a small pocket on the back for the inserts. Also in an attempt to Go Green without Spending Green we asked that people RSVP via our website rather than including a reply card.

The map printed on the back of the Directions insert is my special pride and joy of this project. I really wanted a custom map by Laura Hooper Calligraphy or Couture Maps by Stephanie Barba. I wanted one so bad I was even considering cutting my dress budget down to dollars to make it happen. Then I realized that "Hey, I draw maps and figures all day long. I can do this." I don't make hand drawn maps and couldn't free hand anything like these ladies but I do have some mad skills using Adobe Illustrator. I will have a detailed DIY post later on how I designed the map but for now check out this post from Elizabeth Anne Designs.

Now that they are all done we can begin the tedious task of addressing them. In the beginning I had high hopes of learning calligraphy. Well as with several other projects - that had to go. So instead we are using our trusty laser printer and a package of full sheet labels cut down to size. We designed them so they wrap around the back of the envelope with our return address on the back and we are using the same font as the rest of the stationary (Merceed). Matt is getting in on the action and printing and punching them out. The plan is to print a sheet of labels a day and they should be all good to go for mailing in no time.

Saturday, December 20, 2008

Christmas Projects

I am home for the holidays, hence the lack of posting. First we are in Houston with Matt's parents and next in Nebraska to see my family. From about 70 degrees to -30 windchill. Yeah winter! Just because we are on vacation doesn't mean the wedding planning takes a break. We spent a few hours having a great time looking though old photos for a blast from the past album to display at the Fiesta and NE reception. Instead of a wedding slide show we are going to have a couple of photo albums - M & M In the Begining, M & M Fall in Love, and M & M Get Married. The last one will have photos from the ceremony for people to see because they won't be at the actual vow exchange.

Aren't we cute? Always the academics.


I found some great albums in our wedding colors for only a couple of bucks. They have space in the margins for labels and comments. I also will add a pen and a note to the albums instructing our guests to feel free to leave comments - facebook style. Hopefully we get some great insights from our guests. I am also excited since this isn't a traditional slideshow we can have the albums on display in our house. Since I spend so much time on the computer it will be nice to have actual, tangible, non-digital things to look at.

Tuesday, December 16, 2008

Project REUSE: Ex. 2 and 3

Continuing along the green them this week I will share two more wedding projects highlighting how we are "reusing" some of our decor.

I wanted to make several signs for Fiesta recpetion such as the bar menu, Bienvenidos sign for the guest book table, and a few others. I thought about a dinner menu for each table but then weighed the pros and cons. Pros - they would look awesome and "classy". Cons- only about 3 of my friends would notice (you know who you are Martha wannabes), and with less than 3 months to go - they gotta go. So one dinner menu at the begining of the bu

I am turning these frames already displaying artwork from a recent trip to Vancouver

into this sign for the candy buffet. After the wedding we will transform all the signs back into wall art. The cost was basically 0 because I already had all the paper for the invitation projects. Ahh, green and budget friendly.

Also for the candy buffet I purchased a few apothecary jars (only $6.99 from Ross!!!) which I am also reusing for Christmas decorations.

Other things from our wedding I can use every year and pause and reminise. I love being sentimental. But do you think it is kinda weird that I am anticipating the memories attached to these things before the wedding???

Monday, December 15, 2008

Project REUSE: Example #1

In an effort to make our wedding a little greener, we plant to reuse several items. I really didn't want to end up with 500 votive candle holders or other wedding related crap...eh I mean decor.. after the whole thing was said and done. So every new purchase for the wedding I try to think of how I will reuse it later or if we already have something that could work. This is really cutting down on our consumption and is also great for our budget. :)

I hope to transform our Card Box from this

into a ribbon box (like this from Martha Stewart Crafts at Michaels).I originally purchased the fuchsia box from IKEA for $1.20 on clearance. The ribbon and paper were already on hand for other projects and I can't wait to have a cute place to store ribbon! I am an extreamly sentimental person so I hope to surround our home with all sorts of wedding keepsakes. I prefer these more sublte keepsakes and everyday items. You don't really need a set of engraved champagne glasses gathering dust to remind you of a special moment.

So what do you think? I realize the giant Card Label may be a little much and pretencious. Our venue has this adorable metal cart for gifts. Since we are not expecting many gifts I wanted jazz up the cart somehow.

More Project REUSE to come!

Saturday, December 13, 2008

Success!

So the last two weeks have been the most successful of the entire wedding planning progress. I am so excited to share all of the progress and completed DIY projects. If you have been following along I took the last two weeks off of blogging and blog reading (well sort of) to actually get some things done. We are at the 4 month mark to the ceremony and Fiesta reception and I was panicking. I love reading blogs of other brides because they give me such inspiration but they also make me feel like I am completely behind!

So here is a short list of what we accomplished and a sneak peak of what is to come over the next posts.

1) Ordered my dress!! So excited about this one. Dress shopping has included lots of stress, anxiety, and tears. Now that I found it I couldn't be happier and can't wait for the 8-10 weeks until delivery to be over.

2) Decided on cake order. Sprinkles Cupcakes it is! I also celebrated a birthday during my hiatus (along with Matt the day after mine) so there was lots of opportunity to try out different kinds.

3) Decided on photographer, flowers, and the specific location within Red Rock Crossing for the ceremony in Sedona with the wedding planner.

4) Finished Invitations for Fiesta! This was a big job and included lots of design and working decisions for all of the inserts. Here is a sneak peak including my DIY custom map design. I am so excited about this map and am considering going into business. Sorry about the poor quality photos - camera was having issues.


5) Completed all sorts of DIY projects including a "Just Married/Thank You" banner for photos and later announcement and thank you cards, stamp for candy favor bags, started photo albums for reception (instead of slide show), card box, and some serious list making toand supply shopping finish up everything else.

More regular posting and updates to come!